If you used Softaculous to create your WordPress site, this is the case as well.
The advantages to having your installation placed into a subdirectory, instead of the root includes:
Lets assume we have installed a copy of WordPress into a subfolder 'wpress'.
My Root Directory in this example is 'public_html'
To see my new WordPress site, I must navigate to:
http://www.mywebsitename.com/wpress
When I am ready to have my WordPress installation be used for my main website, e.g.:
http://www.mywebsitename.com
You must perform the following steps:
Short Version:
1) Copy the index.php and .htaccess files from the /wpress directory into the root directory.
2) Edit index.php and correct the "require" path to include the /wpress directory. (see Step 6 below)
3) Edit the WordPress :: General Settings :: Address URLs to reflect the correct installation and base paths. (see Step 7 below)
Detailed Version:
All steps are done from within your Control Panel (cPanel)
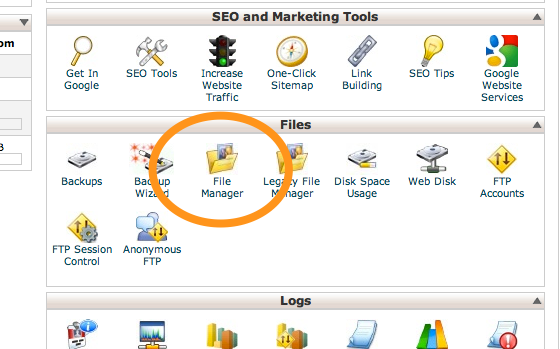
1) Find the File Manager icon in cPanel:
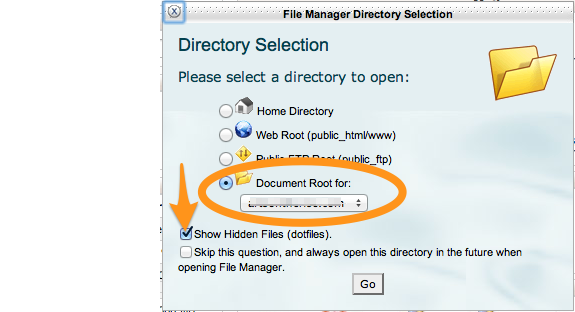
Choose the document root for the website you are working on:
Also make sure the Show Hidden Files checkbox is checked.
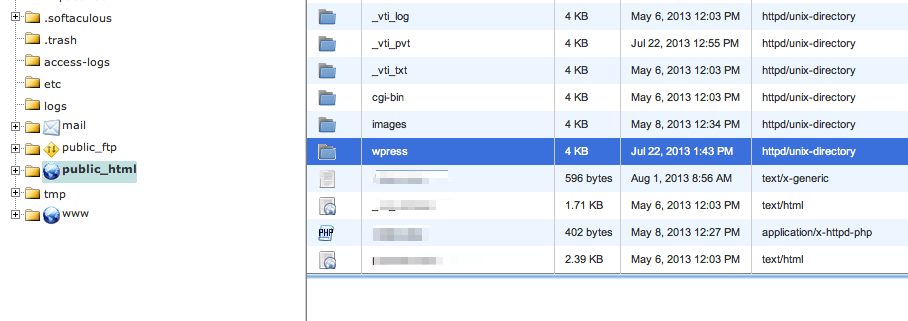
2) Double click on the installation directory ( for this example, it was called wpress )
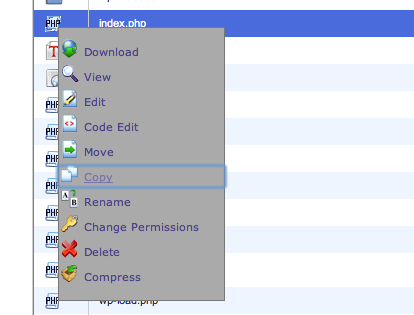
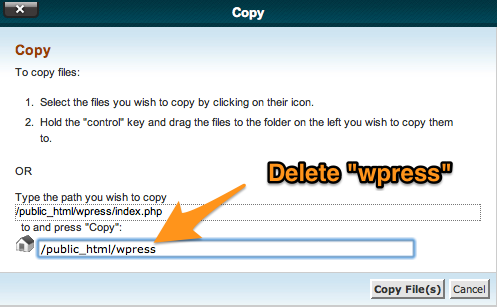
3) Right click on index.php and select Copy
You are copying this file to the root level. To do this, simply delete the wpress directory from the path and press Copy File(s)
3b) Repeat the above steps to copy the .htaccess file to the root directory
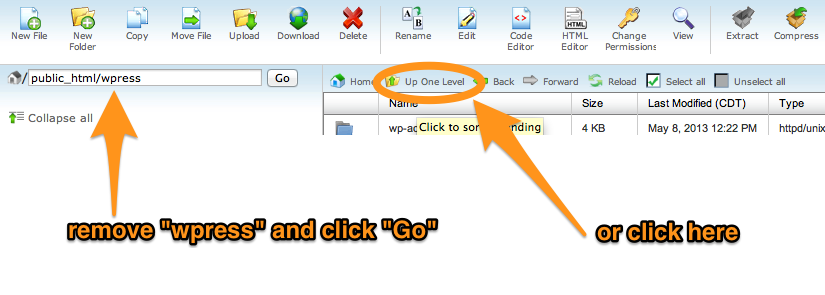
4) Return to the root directory.
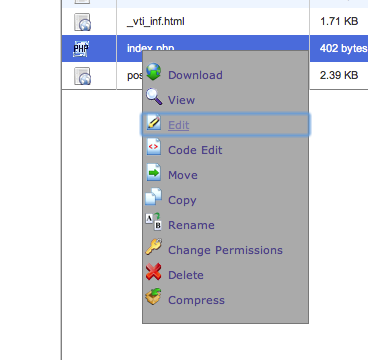
5) Right click on index.php and choose Edit.
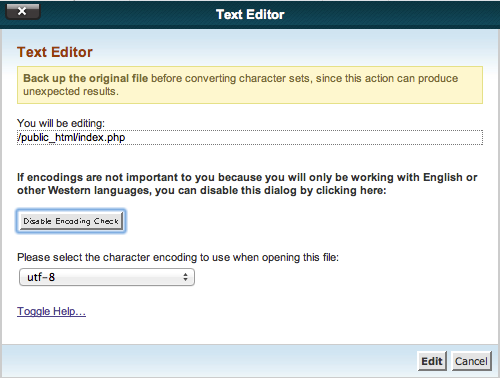
There may be a screen asking for charcater encoding like this one. You can safely ignore it and press the Edit button.
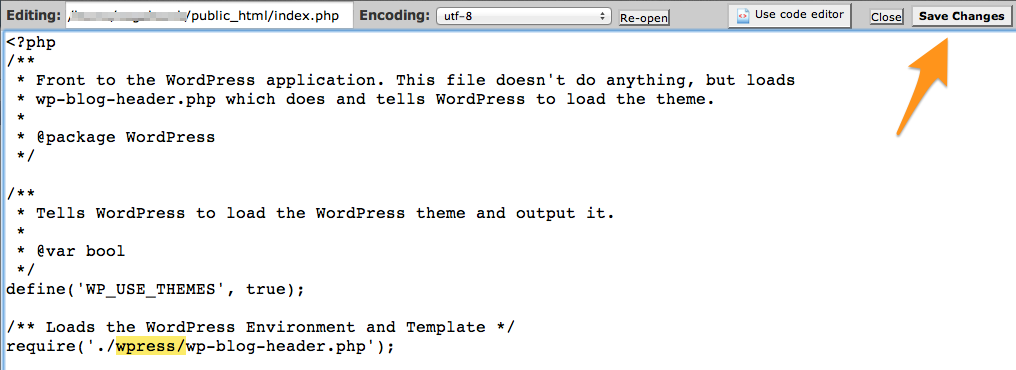
6) You will be ADDING the installation directory to the path in the last line of the file. Then click the Save Changes button.
7) You must now return to your WordPress Administrative Interface and correct the Address URLs listed there.
For (hopefully) the last time, you will need to navigate to: (using the installation directory in your URL path...)
http://www.myswebsitename.com/wpress/wp-admin
Navigate to Admin :: General Settings and correct these settings to reflect your changes: Don't forget to SAVE YOUR CHANGES...

You're all finished!!! Your WordPress website should now appear without the installation directory in the path...
http://www.mywebsitename.com
- Keeps your root folder "clutter free". If you install other packages, such as a shopping cart, you will quickly appreciate having all of these file groups separated.
- An added layer of "security" for your install from automated, or scripted attacks against your root folder.
- Allows you to build a newer "version" of your website without disrupting the original. This is the primary reason why the Softaculous installer creates installations in a subfolder, instead of overwriting root directory files.
Lets assume we have installed a copy of WordPress into a subfolder 'wpress'.
My Root Directory in this example is 'public_html'
To see my new WordPress site, I must navigate to:
http://www.mywebsitename.com/wpress
When I am ready to have my WordPress installation be used for my main website, e.g.:
http://www.mywebsitename.com
You must perform the following steps:
Short Version:
1) Copy the index.php and .htaccess files from the /wpress directory into the root directory.
2) Edit index.php and correct the "require" path to include the /wpress directory. (see Step 6 below)
3) Edit the WordPress :: General Settings :: Address URLs to reflect the correct installation and base paths. (see Step 7 below)
Detailed Version:
All steps are done from within your Control Panel (cPanel)
1) Find the File Manager icon in cPanel:
Choose the document root for the website you are working on:
Also make sure the Show Hidden Files checkbox is checked.
2) Double click on the installation directory ( for this example, it was called wpress )
3) Right click on index.php and select Copy
You are copying this file to the root level. To do this, simply delete the wpress directory from the path and press Copy File(s)
3b) Repeat the above steps to copy the .htaccess file to the root directory
4) Return to the root directory.
5) Right click on index.php and choose Edit.
There may be a screen asking for charcater encoding like this one. You can safely ignore it and press the Edit button.
6) You will be ADDING the installation directory to the path in the last line of the file. Then click the Save Changes button.
7) You must now return to your WordPress Administrative Interface and correct the Address URLs listed there.
For (hopefully) the last time, you will need to navigate to: (using the installation directory in your URL path...)
http://www.myswebsitename.com/wpress/wp-admin
Navigate to Admin :: General Settings and correct these settings to reflect your changes: Don't forget to SAVE YOUR CHANGES...
You're all finished!!! Your WordPress website should now appear without the installation directory in the path...
http://www.mywebsitename.com
